What Tools You'll Need To Assemble Rta Cabinets
If you're fairly handy at home improvement and do-it-yourself projects, it can be tempting to consider doing renovations on your own. The good news? Affordable materials and tools have made tough jobs easier than ever.
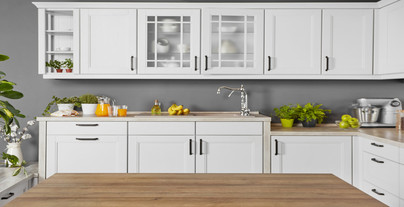
This includes your kitchen, where new cabinets can be a budget buster. If you haven't, consider buying ready to assemble (RTA) cabinets. Not only are they more affordable than custom or pre-assembled cabinetry, but they come in a variety of styles and colors to fit every taste.
If you're seriously considering a kitchen overhaul, but are wondering if you're up for the challenge of RTA cabinets, keep reading. We list all the tools you'll need for a successful cabinet installation.
Must-Have Tools for RTA Cabinets
Installing cabinets is challenging and requires an inordinate amount of patience to make sure it's completed correctly. It can be helpful to have another set of hands to help with lifting, clamping, and drilling. Set aside at least a day or two (depending on the size of your kitchen) to get it done right.
There are also several tools that can mean the difference between back-breaking labor and a hard day's work. If you don't want to purchase these DIY tools, check out social media to borrow or purchase second-hand. You can also rent most of these tools at a home improvement store near you.
Cabinet Jack
Lifting and holding upper cabinets is easily the most difficult aspect of cabinet installation. Boxes get heavy quickly and require a level, flush fit.
To make this easier, make sure you have a cabinet jack on hand. A cabinet jack holds the upper cabinet in the exact right spot while their shimmed, clamped, and attached to the adjacent cabinet.
Instead of relying on Atlas to hold the weight on his shoulders, take the time to get a hold of this tool to make everything run much more smoothly.
Cabinet Claw
Properly installed cabinets fit tightly together and are identically fit. Nothing indicates a sloppy installation job like gaps and crooked cabinetry.
A cabinet will make sure your cabinet boxes fit together snugly while being attached together. A tight fit is almost impossible without one of these handy tools.
Level
It's worth repeating, but a sloppy installation is easily spotted when both upper and lower kitchen cabinets aren't level. Your countertops, especially if they're solid surface, marble, granite, or quartz, can't be installed on uneven cabinets.
You need a long (6 feet) level, or better yet, a laser level. It creates a perfectly even line that will allow you to install your cabinets so that they are perfectly level.
Don't waste money on high quality cabinetsonly to do a poor job installing them.
Shim
Floors aren't always level. This is especially true in older homes whose foundations have settled.
To compensate for this, it's common to place a wedge of wood, called a shim, to help create a level installation. The size and placement will depend on what needs to be leveled. These are then glued to the base of the cabinet so that they stay securely in place.
Stud Finder
To prevent your cabinets from falling off the walls, hitting electrical wires, or plumbing, buy a stud finder. It's a cheap and easy tool that can save you many expensive fixes and headaches down the road.
Drill
You'll need to drill to mount cabinets, attach them together, and install hardware. A good quality drill and the proper drill bits will go a long way to making your installation a smooth process.
A cordless drill can help prevent long extension cords and tripping hazards in an already chaotic work environment. It's a smart idea to invest or rent one that will help you drill wherever and whenever.
Filler Strips
Despite your best efforts, your cabinets may have gaps. This can be due to walls that aren't flush, among other possibilities.
A cabinet filler strip can be installed to help hide this gap. However, you'll probably also need some putty and a belt sander to help smooth the joint.
Should-Haves
While there are many tools that are necessary to help you properly install the best DIY cabinets, there are others that simply make the job easier. This can help save your back, your knees, and even time to make the process go by faster.
Cabinet Wedges
A cabinet wedge is a small, inflatable bag that is powered by a hand pump. When you need to place multiple shims, you slide the deflected bag underneath and pump it to help lift the base cabinet. This allows you to place a shim much more quickly and with less time crawling around on the floor.
Handle Template
Don't eyeball your cabinet pulls and handles. And while measuring each is more accurate, it can also take a lot of time for multiple drawers and cabinets.
Instead, a template is a cheap and easy solution that allows you to hit the exact same spot on each door and drawer. Your eye will be drawn to the one pull that's not identical to the rest, so save yourself the trouble and get it right from the get-go.
Trim Nailer
Installing the finishing touches, such as trim and crown molding, requires a lot of tiny finishing nails. The process is much quicker with a trim nailer that allows you to fasten these finish touches in a fraction of the time and with less damage.
Miter Saw
Crown molding and trim cuts can be some of the trickiest. A miter saw makes it quicker. Or you can go cheaper and buy a miter box, but this will be more time-consuming.
It's Easier Than You Think
The list of tools and time investment in installing RTA cabinets can seem overwhelming.But it's worth it for the new kitchen and updated look you'll achieve. And best of all? You're saving a significant amount of money by going with ready to assemble cabinets.
If you're still wondering if RTA cabinets are for you, check out ourother blog poststo see how easy it can be. And don't hesitate to contact us with any questions you may have!
- Frameless RTA Kitchen Cabinets: Streamlined Elegance for Modern Homes
 January 1, 2024
 - The Ultimate Guide to Ready Kitchen Cabinets: Choosing the Best Fit for Your Home
 January 1, 2024
 - Cabinetry Trends for 2023: Exploring Vibrant Colors and Timeless Patterns
 September 29, 2023
 - Latest Trends in Kitchen Cabinets-2023
 September 29, 2023
 - Transforming Your Kitchen with RTA Cabinets: Before and After Inspiration
 August 16, 2023